As your big day is nearing, chances are good you’re going to find yourself with very empty pockets and with no extra money for the little things such as getting your nails done for your wedding.
The good news is because nail art is such a thing right now, sites like Pinterest and Instagram are literally swarming with fantastic DIY nail art ideas. Plus there’s a plethora of nail art products to be found in drugstores and beauty supply stores that can help you easily give yourself a fabulous wedding day manicure that no one will ever know wasn’t done at an expensive nail salon.
Here’s a look at some of our favorite DIY nail designs that we’ve found while cruising around the ‘net. Remember these are just meant to be a guide to show you what’s out there – feel free to customize to make it your own and works best for you on your special day!
French Manicure
Nothing says a wedding manicure more than the classic French manicure. Although they may seem hard to do, they can actually be quite simple when you have the right tutorial to follow. Here’s a great easy-to-follow French manicure tutorial video from My Simple Little Pleasures. And they don’t have to be boring either — check out this tutorial for a colorful French manicure on Makeup.com that uses simple tape as an inexpensive nail guide. Or you can purchase French nail guides in drugstores and beauty supply stores or these on amazon.com.
Polka Dots
Courtesy laurendall.tumblr.com
Polka dots are classic and always on trend. Plus they’re insanely easy to do on your nails! Simply apply a base coat to your nails — or go completely au naturale and keep your nails bare — and apply dots to your nails in whatever color you like. Go small or large, many or just a few. Or combine two classics together with a dotted French manicure! Dots can be done freehand using a nail brush or use a dotting tool like this set, which comes with five different sized tools.
Glitter Tips
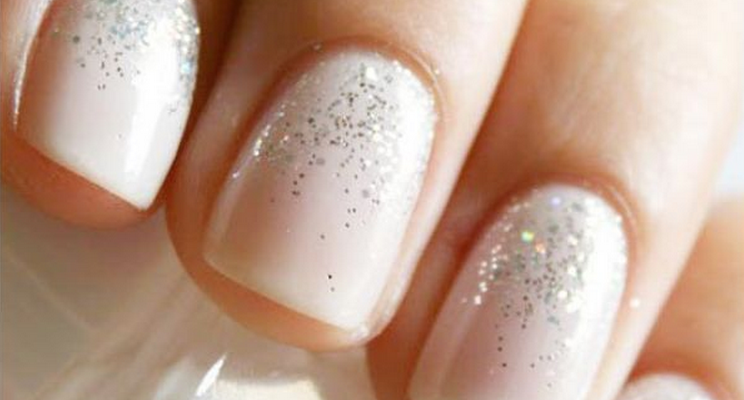
If you’re looking for a bit of sparkle for your special day, consider this beautiful manicure featuring a metallic polish with glitter gradient on the tips in a complementary color. After your base polish is fully dry, take your glitter polish and apply a small amount to the nail tip. Quickly clean off the nail brush of any excess glitter polish and run the brush down the glitter polish to distribute it a bit down the nail. Once the glitter polish dries, you can leave it as is for a textured effect or seal with a clear top coat.
Lace Nails
Courtesy bornprettystore.com
Lace has always been synonymous with weddings, so why not dress up your nails with a lace manicure? There’s lots of different ways to get a lace pattern on your nails. For instance, this video tutorial by JofoKitty shows how you can apply actual lace fabric to your nails for a manicure with a lot of wow. Another option to achieve that lace pattern look is to use a nail stamper, such as one available by Born Pretty. Or if you’ve got mad nail art skills, you can freeform paint a lace design on your nails, like this one from Nails by Chi Chi.
Rhinestones
Who doesn’t want bling on their wedding day?! Applying rhinestones to your nails is super-easy thanks to lots of great tools available in beauty supply stores and even your local drugstores. Check out this starter kit from Kiss that includes pretty much everything you’ll need to do some spectacular nail art, including rhinestones, glitter, pre-cut nail art, and more. Or if you have time to order online, there are rhinestones in pretty much every color of the rainbow. And the rhinestones can be applied simply using your top coat or you can buy a nail glue such as this one. Here’s a kit that contains a selection of rhinestone colors, a tool and glue!


Leave a Reply